Notion is a powerful tool for streamlining work processes and increasing productivity levels. It can be leveraged by a varied user base from a multitude of industries. In a previous post, I mentioned that I would be posting a Notion guide for putting together case studies. Well, the wait is finally over! This post serves as a quick tutorial for organizing and assembling UX case studies with the aid of Notion.
NOTION BASICS
Notion functions on both Windows and Apple platforms, and is downloadable here: link. Once downloaded, you can create an account using your email, Google account, or Apple ID. To get started using Notion, here is a video by the official Notion YouTube channel that explains the various tools it offers:
In general, the interface is highly intuitive and user-friendly. I recommend experimenting and discovering which page configurations work best for you.
READYING ASSETS
The first thing I suggest doing is getting all of your images, videos, and written documentation ready. I prefer organizing my files into folders nestled within a main case study folder, properly labeled by the phases of the design sprint process. By doing so, you have an asset library ready to go, and it will make the following steps much easier. I will be using my Notion setup for Oishii as an example for this whole post. To demonstrate, here is what my asset library looks like:

THE PORTFOLIO PAGE
Once you have your assets ready, go ahead and create a page dedicated to your portfolio within Notion. You can customize it however you wish with a custom icon and banner image. It may seem a bit over-the-top but I prefer using a small caps font for all of my section headers, titles, and table column headers. I find that this keeps the appearance of my pages neat. If you’d like to do this as well, this site generates such font for you. Moving on, at the very top of the page, I keep links to subpages with future portfolio ideas, prompts, and design challenges, as well as a checklist to track my to-dos for the week.
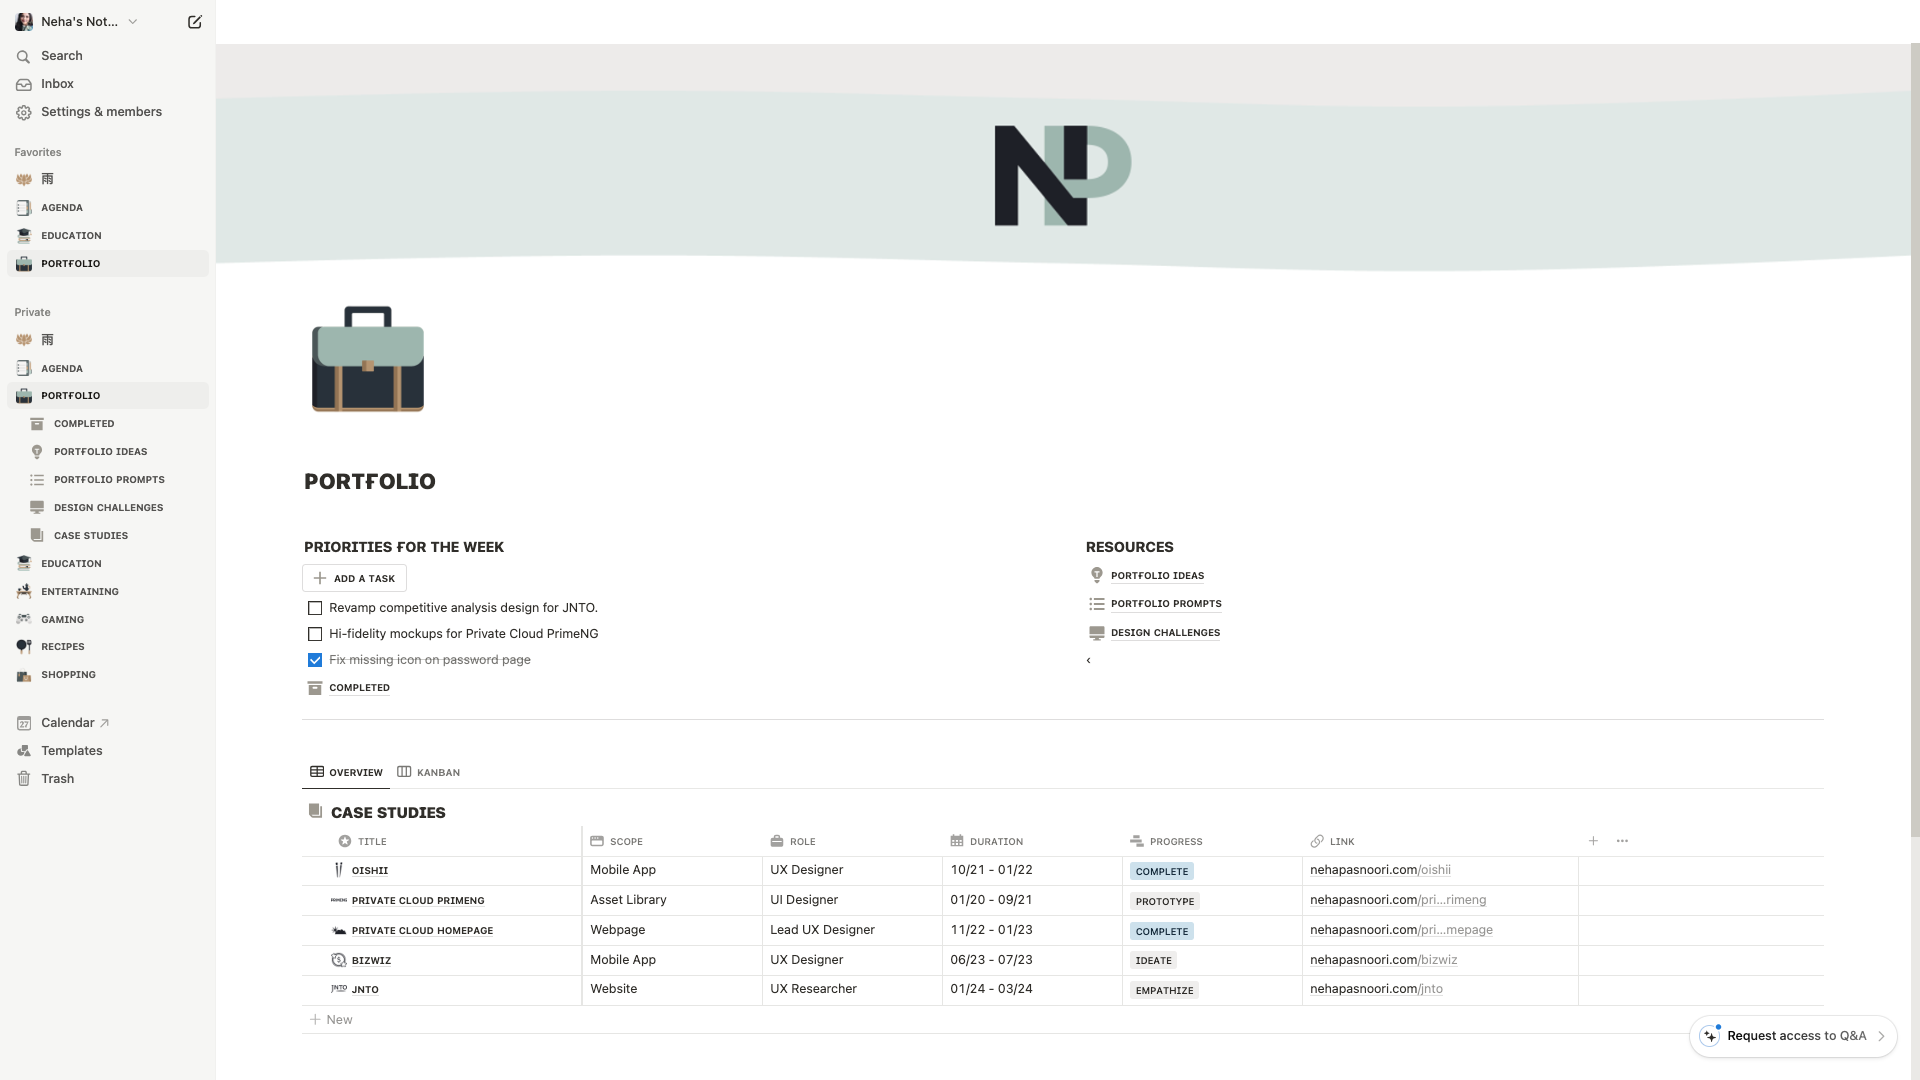
Then below, I have a table dedicated to my case studies. I’ve created two views for this: a default tabular view, and a kanban view. The kanban view allows me to see how I am progressing with all my case studies as a single glance.
SETTING UP THE CASE STUDY
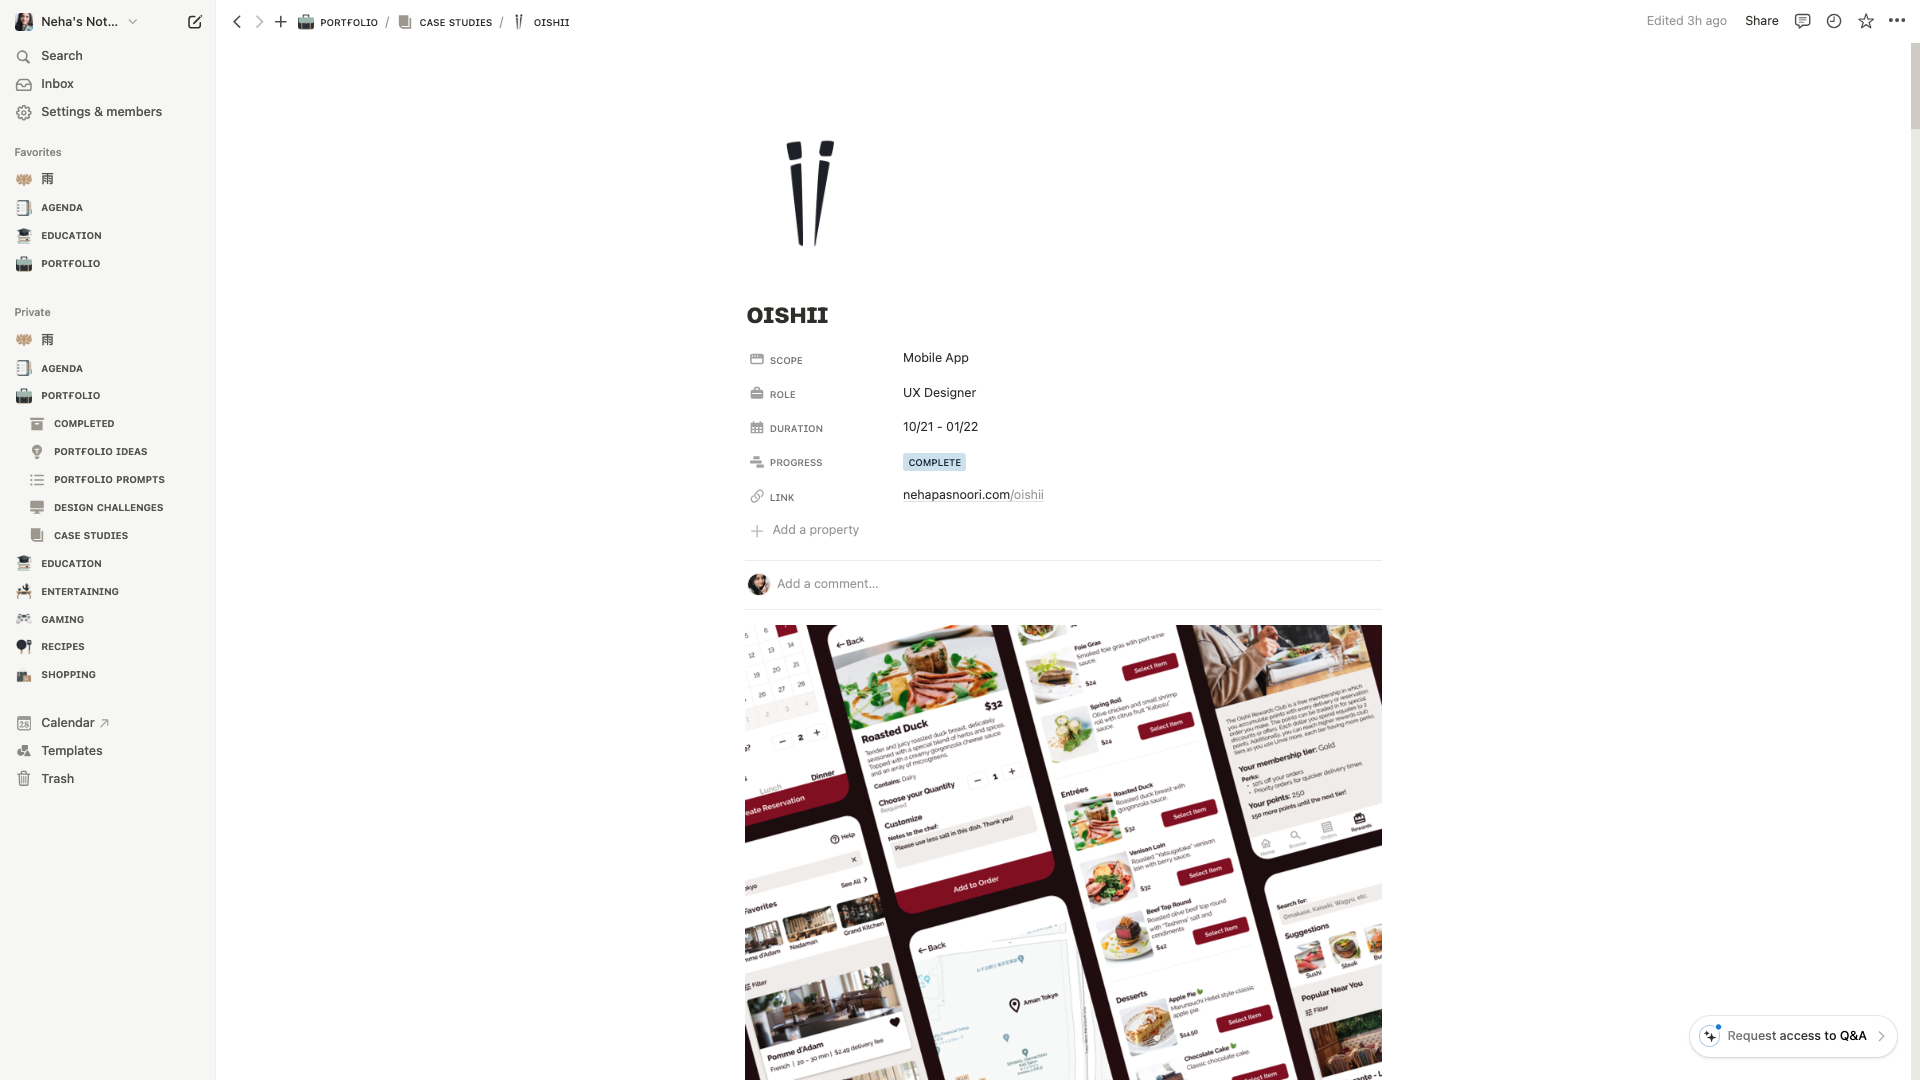

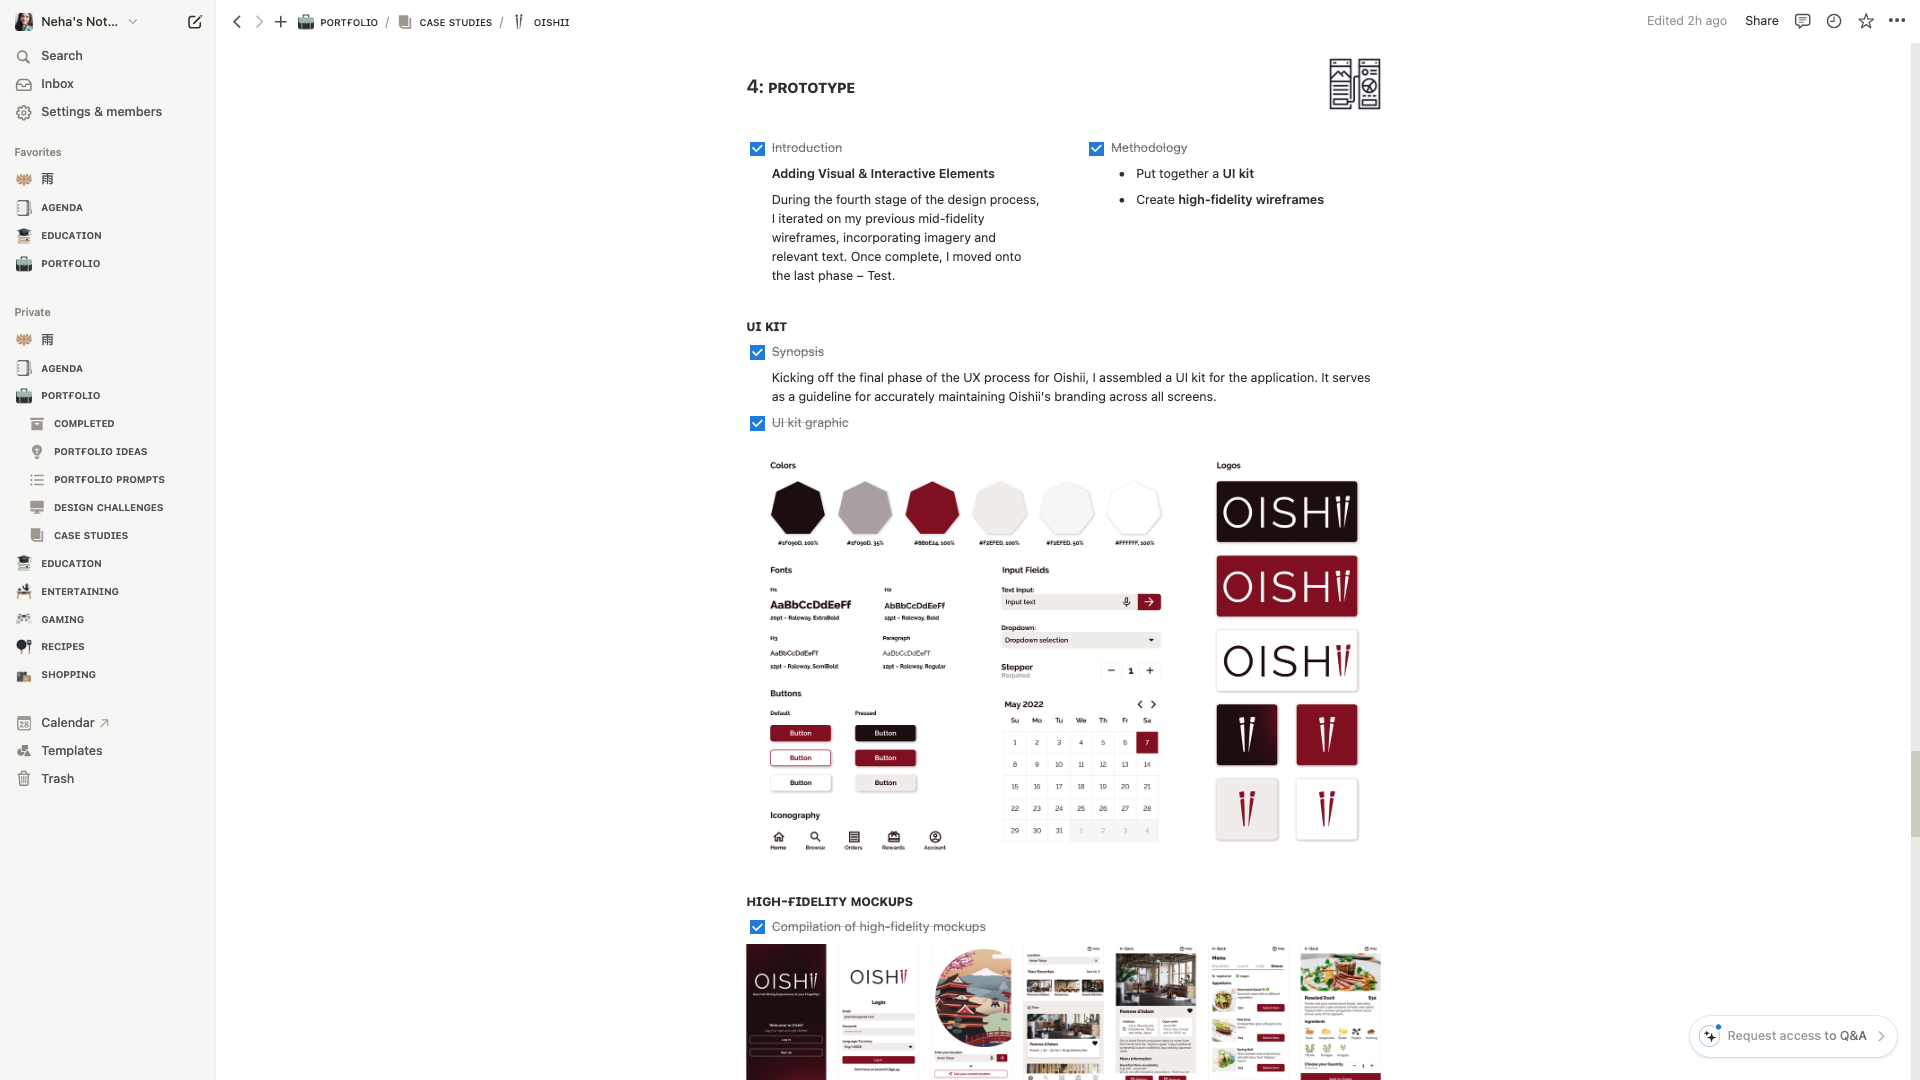
To make life simpler for myself, I set up each of my Notion case study pages in similar fashion to how I wanted the corresponding case study presentations on my portfolio to look like. So I chose the sections to include, placed images where ever they were necessary, and even matched up text alignment as much as Notion allowed me. All of the text was pulled from my already written project documentation; I made sure to edit everything to be less verbose and more concise. After all, a recruiter perusing your portfolio only has a few minutes to glean the essentials of your projects. Therefore, the more clear and comprehensible your writing is, the more beneficial it is for you to qualify for the next phase of the interview process.
Any case study page you’ve created can easily be duplicated and made to fit other new projects, so there is no need to rewrite or reformat everything. All you would need to do is replace sections and images to whatever you require.
IN CONCLUSION
That wraps up my quick guide to using Notion for setting up case studies. In the past, I’d get quite stressed and overwhelmed by the prospect of updating my portfolio. However, now I am more at ease. Having everything readily available within Notion like this makes designing a portfolio website much less daunting. I hope you found this guide helpful in some way!
Have you used Notion to structure your portfolio before? How was your experience with it? Please feel free to leave a comment with your thoughts down below!

Leave a comment